Region (rectangular pixel area on a screen)
- class Region
The Region is besides Images/Patterns (called Visuals) and Matches (where a Visual was found and how) the basic element in the SikuliX concept. So be sure, you have understood all aspects of a Region.
- A Region is a rectangular area on a
Screenand is defined by its upper left corner (x, y) being the pixel with this offset relative to the upper left corner of the screen (usually (0, 0) ) and
its dimension (w, h) as its width and height in pixels.
x, y, w, h are integer numbers counting a distance in pixels.
A Region does not know anything about it’s visual content (windows, pictures, graphics, text, …). It only knows the position on the screen and its dimension.
A Match, being the result of a Region.find() operation, basically is a Region in all aspects,
just having a few additional attributes specific for a find result.
New Regions can be created in various ways:
specify their position and dimension
extend a given Region in all directions (expand or shrink)
based on adjacent rectangles up to the bounds of the screen horizontally or vertically.
based on their corners
as subregions being rows, columns or cells of a regular grid
combine different Regions or use their intersection
You can use Region.find(), to search a given Visual being a rectangular pixel pattern
(given as an Image (filename or Image) or a Pattern object) within this Region.
If this Visual is found in the Region, the resulting Match object
has a similarity score between >0 and 1. The lower the similarity score, the higher the chance,
that you got a false positive (found something else). To make your scripts robust against false positives,
you should take care, to get similarity scores >0.85 or even >0.9.
If the Visual is given for the search as an Image , Sikuli uses a
minimum similarity of 0.7, which only returns Matches with a score >0.7.
This default value can be changed in Settings.MinSimilarity.
A Pattern is searched with the optionally given minimum similarity using Pattern.similar().
Find operations return a
Match object, which has all attributes and methods of a Region
and can be used in the same way as a Region (e.g. find something or click another
target inside). A Match has the size in pixels of the Visual used
for searching, the position where it was found, the similarity
score and the elapsed time.
Look here for more detailed information on How SikuliX finds images on the screen.
Be aware: every mouse or keyboard action, that specifies a Visual to search for, will internally do the respective find operation first, to evaluate the action target.
A Region remembers the match of the last successful find operation,
all matches of the last successful Region.findAll() and the elapsed time.
With Region.getLastMatch(), Region.getLastMatches()
and Region.getLastTime() you can get these objects/value.
You can wait for a Pattern to appear
using Region.wait() or wait for it to vanish using Region.waitVanish()
Every not successful find operation (even those done internally with a click() …) will raise a FindFailed exception, that has to be handled in your script. If you do not do that, your script will simply stop here with an error.
If you do not want to handle these FindFailed exceptions,
you might search for a Pattern using exists,
which just returns nothing (None/null) in case of not found.
So you simply check the return value for being a Match.
For other options to handle FindFailed situations see FindFailed exception.
During a find operation internally the search is repeated with a scan rate (standard 3 per second) until success or an optionally given timeout (standard 3 seconds) is reached, which then results in a FindFailed exception.
Sikuli supports visual event driven programming: You can tell a Region to observe that something appears, vanishes or changes. It is possible to wait for the completion of an observation or let it run in the background, while your script continues running. When one of the visual events happens, a handler in your script is called. Each Region can only have one observer, but each observer can observe multiple visual events in that Region. You might also check the status of a background observation later in your workflow, to handle events inline. Generally it is your responsibility to stop observations, but at termination of your script or Java program all observations are terminated automatically.
NOTE: For hints and tips how to get robust and fast acting workflows look into the Best Practices.
Create a Region, Set and Get Attributes
NOTES
In any case a newly created Region will be restricted to the boundaries of the screen containing the largest part of the new Region.
It displays an error, if no part of the newly created Region is contained by any of the available screens. Subsequent usages of such a Region might result in errors, exceptions or even crashes, if features are used, that access the screen.
Use Region.isValid() to check, wether a Region is contained by a screen.
Create a new Region based on top left corner and size
- class Region
- Region(x, y, w, h)
- Region(region)
- Region(Rectangle)
Create a region object
- Parameters:
x – x position of top left corner
y – y position of top left corner.
w – width of the region.
h – height of the region.
region – an existing Region object.
rectangle – an existing object of class java.awt.Rectangle
- Returns:
a new Region object.
For other ways to create new Regions see: Extend Regions ….
NOTE: The position and dimension attributes are named x, y representing the top left corner and w, h being width and height. You might access/change these values directly or use the available getter/setter methods.
topLeft = Location(reg.x, reg.y) # equivalent to
topLeft = reg.getTopLeft()

theWidth = reg.w # getting the width equivalent to
theWidth = reg.getW()

reg.w = theWidth # setting the width equivalent to
reg.setW(theWidth)

# same is available for the height: reg.h, reg.getH(), reg.setH()
Note: Additionally you might use
selectRegion()to interactively create a new region at runtime.NOTE: Using Region(someOtherRegion) just duplicates this region (creates a new object). This can be useful, when you need the same Region with different attributes, such as another observation loop or another setting for
Region.setThrowException()to control whether throwing an exception or not when find ops fail.
Change a Regions position and/or size
- class Region
- setX(number)
- setY(number)
- setW(number)
- setH(number)
Set the respective attribute of the region to the new value. This effectively moves the region around and/or changes its dimension.
- Parameters:
number – the new value
- moveTo(location)
Set the position of this region regarding it’s top left corner to the given location (the x and y values are modified).
- Parameters:
location – location object becomes the new top left corner
- Returns:
the modified region object
reg.moveTo(anotherLocation) # equivalent to
reg.setX(anotherLocation.x); reg.setY(anotherLocation.y)
- setROI(x, y, w, h)
- setROI(rectangle)
- setRect(x, y, w, h)
- setRect(rectangle)
- All these methods are doing exactly the same:
setting position and dimension to new values. The motivation for two names is to make scripts more readable:
setROI()is intended to restrict the search to a smaller area to speed up processing searches (region of interest), whereassetRect()should be used to change a region (move and/or shrink or enlarge).
- Parameters:
h (all x, y, w,) – the attributes of a rectangle
rectangle – a rectangle object
- Returns:
None
- morphTo(region)
Set the position and dimension of this region to the corresponding values of the region given as parameter. (see:
setRect())- Parameters:
region – a region object
- Returns:
the modified region object
reg.morphTo(anotherRegion) # equivalent to
r = anotherRegion; reg.setX(r.x); reg.setY(r.y); reg.setW(r.w); reg.setH(r.h)
Access a Region’s attributes and settings
- class Region
-
- getTopLeft()
- getTopRight()
- getBottomLeft()
- getBottomRight()
Get the location of the region’s respective corner
- Returns:
Location object
- getLastMatch()
- getLastMatches()
To access the Matches returned by the last find op in this Region.
- Returns:
a
Matchobject or a list of Match objects
All basic find operations (explicit like
Region.find()or implicit likeRegion.click()) store the match inlastMatchand multi-find ops (likeRegion.findAll()) all found matches intolastMatchesof the Region that was searched.How to go through the Matches returned by getLastMatches().
TIPP: The
LastMatchcan be used to avoid a second search for the same Visual in sequences like:wait(someVisual) click(someVisual) # or if exists(someOtherVisual): click(someOtherVisual)
To avoid the second search with the
click()you can use:wait(someVisual) click(getLastMatch()) # or if exists(someOtherVisual): click(getLastMatch())
There are convenience shortcuts for this:
wait(someVisual)
click()
# or
if exists(someOtherVisual):
        click()
See
Region.click()for the usage of these convenience shortcuts. AsomeRegion.click()will either click the center of the given Region or thelastMatch, if any is available.
- getTime()
- Returns:
the elapsed time in number of milli-seconds of the last find op in this Region
Attributes influencing the behavior of features of a Region
- class Region
NOTE For settings influencing the handling of Visual-not-found situations in this Region look here: FindFailed Exceptions.
- isRegionValid()
- Returns:
False, if the Region is not contained by a Screen and hence cannot be used with faetures, that need a Screen (find, capture, …), otherwise True.
- setAutoWaitTimeout(seconds)
Set the maximum waiting time for all subsequent find operations in that Region.
- Parameters:
seconds – a number, which can have a fraction. The internal granularity is milli-seconds.
All subsequent find ops will be run with the given timeout instead of the current value of
Settings.AutoWaitTimeout, to which the region is initialized at time of creation (default 3 seconds).
- getAutoWaitTimeout()
Get the current value of the maximum waiting time for find ops in this region.
- Returns:
timeout in seconds
- setWaitScanRate(rate)
Set this Region’s value: A find op should repeat the search for the given Visual
ratetimes per second until found or the maximum waiting time is reached. At time of Region creation the value is initialized fromSettings.WaitScanRate, which has a default of 3.- Parameters:
rate – a value > 0. values < 1 will lead to scans every x seconds and hence longer pauses between the searches (reduces cpu load).
TIPP Since on average the shortes search times are some milli seconds,
rate> 100 will lead to a continous search under all circumstances.
- getWaitScanRate()
Get the current value of this Region’s
WaitScanRate.- Returns:
the rate number
Get evenly sized parts of a Region (as rows, columns and cells based on a raster)
In many cases, one has parts of a GUI, that are to some extent evenly structured, having some virtual raster (rows, columns and/or cells), that one wants to use for restricting searches or walk through this parts for other reasons.
Typical examples are tables like in an Excel sheet, boxes in some GUI or on a webpage or dropdown lists and menues.
A given Region can be set to have some evenly sized raster, so that one can access these subregions and create new Regions.
Convenience functions, to get a subregion from a specified raster in one step
- class Region
- get(somePart)
Select a part of the given Region based on the given part specifier.
- Parameters:
somePart – a constant as Region.CONSTANT or an integer between 200 and 999 (see below)
- Returns:
a new Region created from the selected part
Usage based on the javadocs:
Constants for the top parts of a region (Usage: Region.CONSTANT)
shown in brackets: possible shortcuts for the part constant
NORTH (NH, TH) - upper half
NORTH_WEST (NW, TL) - left third in upper third
NORTH_MID (NM, TM) - middle third in upper third
NORTH_EAST (NE, TR) - right third in upper third
... similar for the other directions:
right side: EAST (Ex, Rx)
bottom part: SOUTH (Sx, Bx)
left side: WEST (Wx, Lx)

specials for quartered:
TT top left quarter
RR top right quarter
BB bottom right quarter
LL bottom left quarter

specials for the center parts:
MID_VERTICAL (MV, CV) half of width vertically centered
MID_HORIZONTAL (MH, CH) half of height horizontally centered
MID_BIG (M2, C2) half of width / half of height centered
MID_THIRD (MM, CC) third of width / third of height centered

Based on the scheme behind these constants there is another possible usage:
specify part as e 3 digit integer where the digits xyz have the following meaning
1st x: use a raster of x rows and x columns
2nd y: the row number of the wanted cell
3rd z: the column number of the wanted cell
y and z are counting from 0
valid numbers: 200 up to 999 (< 200 are invalid and return the region itself)
example: get(522) will use a raster of 5 rows and 5 columns and return the cell in the middle
special cases:
if either y or z are == or > x: returns the respective row or column
example: get(525) will use a raster of 5 rows and 5 columns and return the row in the middle
Internally this is based on
Region.setRaster()andRegion.getCell().If you need only one row in one column with x rows or only one column in one row with x columns you can use
Region.getRow()orRegion.getCol()- getRow(whichRow, numberRows)
- Parameters:
numberRows – in how many evenly sized rows should the region be devided
whichRow – the row to select counting from 0, negative counts backwards from the end
- Returns:
a new Region created from the selected row
- getCol(whichColumn, numberColumns)
- Parameters:
numberColumns – in how many evenly sized columns should the region be devided
whichColumn – the column to select counting from 0, negative counts backwards from the end
- Returns:
a new Region created from the selected column
The basic functions for any raster setup
- class Region
- setRows(numberRows)
- setCols(numberColumns)
Define a rows or columns only raster, by dividing the Region’s respective dimension into even parts. The corresponding Regions will only be created, when the respective access methods are used later.
- Parameters:
numberRows – the number of rows the Region should be devided in
numberColumns – the number of columns the Region should be devided in
- Returns:
the first element as new Region if successful or the region itself otherwise
- setRaster(numberRows, numberColumns)
Define a raster, by deviding the Region’s height in
numberRowseven sized rows and it’s width intonumberColumnseven sized columns.- Parameters:
numberRows – the number of rows the Region should be devided in
numberColumns – the number of columns the Region should be devided in
- Returns:
the top left cell (
getCell(0, 0)) if success, the Region itself if not
- getRow(whichRow)
- getCol(whichColumn)
Get the Region of the
whichRowrow orwhichColumncolumn in the Region’s valid raster counting from 0. Negative values will count backwards from the end. Invalid indexes will return the last or first element respectively.- Parameters:
whichRow – the number of the row to create a new Region from
whichColumn – the number of the column to create a new Region from
- Returns:
a new Region representing the selected element or the Region if no raster
- getCell(whichRow, whichColumn)
Get the cell with the coordinates (
whichRow,whichColumn) in the Region’s valid raster counting from 0. Negative values will count backwards from the end. Invalid indexes will return the last or first element respectively. If the current raster only has rows or columns, the element of the corresponding index will be returned.- Parameters:
whichRow – the number of the row
whichColumn – the number of the column
- Returns:
a new Region representing the selected element or the Region itself if no raster
getting information about the current raster
Extend Regions and create new Regions based on existing Regions
NOTES:
Except otherwise noted
these methods return new Region objects, whose location and size are based on the specified region.
the given base Region remains unchanged.
In any case the new Region will be restricted to the boundaries of the screen containing the largest part of the new Region.
It displays an error, if no part of the new Region is contained by any of the available screens. Subsequent usages of such a Region object might result in errors, exceptions or even crashes, if features are used, that acces the screen.
Use Region.isValid() to check, wether a Region is contained by a screen.
- class Region
- offset(location)
- offset(x, y)
Creates a new Region object, whose upper left corner is relocated adding the given x and y values to the respective values of the given Region. Width and height are the same.
- Parameters:
location – a
Locationobject providing the relocating x and y valuesx – a number being the offset horizontally (< 0 to the left, > 0 to the right)
y – a number being the offset vertically (< 0 to the top, > 0 to the bottom)
- Returns:
the new
Regionobject
new_reg = reg.offset(Location(xoff, yoff)) # same as
new_reg = Region(reg.x + xoff, reg.y + yoff, reg.w, reg.h)
- inside()
Returns the same object. Retained for upward compatibility.
region.inside().find()is totally equivalent toregion.find().- Returns:
Region itself
NOTE: Besides the individual methods like nearby, left, right, above, below there is one
new method grow with some more options and different signatures. Where documented together,
they are fully equivalent. The reason behind is some better compatibility to the usage of Java Rectangle.
- class Region
- grow([range])
- nearby([range])
The new region is defined by extending (>0) or shrinking (<0) the current region’s dimensions in all directions by
rangenumber of pixels. The center of the new region remains the same.The default is taken from
Settings.DefaultPadding(standard value 50)- Parameters:
range – an integer indicating the number of pixels or the current default if omitted.
- Returns:
a new
Regionobject
- above([range])
- below([range])
- left([range])
- right([range])
Returns a new
Regionthat is defined with respect to the given region:above: new bottom edge next pixel row above given region’s top edge
below: new top edge next pixel row below given region’s bottom edge
left: new right edge next pixel clomn left of given region’s left edge
right: new left edge next pixel column right of given region’s right edge
It does not include the current region. If range is omitted, it reaches to the corresponding edge of the screen.
- Parameters:
range – a positive integer defining the new demension aspect (width or height)
- Returns:
a new
Regionobject
- grow(width, height)
same as
grow(range), but with separate values horizontally and vertically. 0 means no change.
- grow(left, right, top, bottom)
same as
grow(range), but with a separate value for each side. 0 means no change.
Finding inside a Region and Waiting for a Visual Event
Besides acting on visual objects, finding them is one of the core functions of Sikuli.
PARAMETER PS: means, that either a Pattern or a string (path to an image
file or just plain text) can be used as parameter. A find operation is
successful, if the given image is found with the given minimum similarity or
the given text is found as specified.
Similarity is a value between 0 and 1, that tells us how likely the given image looks like (matches)
the target (the higher the value the higher the probability of an exact match).
With most features, the similarity is trimmed to 2 decimals and a value greater
than 0.99 meaning exact match (reported as 1.00). The default similarity used for searching is 0.7,
if not specified using a Pattern. A search success (a match) is reported, if an image is found
with a similarity score higher than the given similarity, which might be the default.
Normally all these region methods are used as reg.find(PS), where reg is a region object.
In SikuliX scripts: If written as find(PS) it acts on the default screen, which is
an implicit region in this case (see: SCREEN as Default Region).
But in most cases it is a good idea to use reg.find() to restrict the search to a
smaller region in order to speed up processing.
BE AWARE with Java or other scripting/programming languages not supported by the SikuliX IDE/scripting feature:
you must always use the so called dotted version of the Region methods (someRegion.find(someImage)).
If a find operation is successful, the returned match is additionally stored
internally with the region that was used for the search. So instead of using a
variable to store the match ( m = reg.find() ), you can use reg.getLastMatch() to access
it afterwards. Unsuccessful find operations will leave these values unchanged.
By default, if the visual object (image or text) cannot be found, Sikuli
will stop the script by raising an Exception FindFailed.
Following the standards of the Python language, you could handle such exceptions using
try: ... except: .... The same is true for other scripting/programming languages.
If you are not used to programming using the Python language or because of other reasons, you might just want to bypass the exception handling, which means just ignoring it (None is returned in that case). Or you might interactively react on a FindFailed situation (e.g. optionally repeat the find). Read more about concepts and options at: Exception FindFailed.
If you have multiple monitors, please read Multi Monitor Environments.
Note on IDE: Capturing is a tool in the IDE, to quickly set up images to search for. These images are named automatically by the IDE and stored together with the script, at the time it is saved (we call the location in the file system bundle-path). Behind the curtain, the images itself are specified simply by using a string containing the file name (path to an image file).
- class Region
- find(PS)
- Parameters:
PS – a
Patternobject or a string (path to an image file or just plain text)- Returns:
a
Matchobject that contains the best match or fails if not found
Find a particular pattern, which is the given image or just plain text. It searches within the region and returns the best match, that shows a similarity greater than the minimum similarity given by the pattern. If no similarity was set for the pattern by
Pattern.similar()before, a default minimum similarity of 0.7 is set automatically.Be aware
find(PS)does not wait for the appearence, it just comes back after one search try and will throw FindFailed in case of not found.Side Effect lastMatch: the best match can be accessed using
Region.getLastMatch()afterwards.
- findAll(PS)
- Parameters:
PS – a
Patternobject or a string (path to an image file or just plain text)- Returns:
one or more
Matchobjects as an iterator object or fails if not found
How to iterate through is documented here.
Repeatedly find ALL instances of a pattern, until no match can be found anymore, that meets the requirements for a single
Region.find()with the specified pattern.By default, the returned matches are sorted by the similiarty. If you need them ordered by their positions, say the Y coordinates, you have to use Python’s sorted function. Here is a example of sorting the matches from top to bottom:
def by_y(match):
   return match.y

icons = findAll("png_icon.png")
# sort the icons by their y coordinates and put them into a new variable sorted_icons
sorted_icons = sorted(icons, key=by_y)
# another shorter version is using lambda.
sorted_icons = sorted(icons, key=lambda m:m.y)
for icon in sorted_icons:
   pass # do whatever you want to do with the sorted icons
Side Effect lastMatches: a reference to the returned iterator object containing the found matches is stored with the region that was searched. It can be accessed using getLastMatches() afterwards. How to iterate through an iterator of matches is documented here.
Convenience methods
findAllByRow() # sorted along rows top down - left to right in a row
findAllByColumn() # sorted along columns left to right - top down in a column

findAllList() # same as findAll(), but returns a list (Java: List<Match>) sorted by score descending
getAll() # shortcut for findAllList()

All these methods return lists (Java: List<match>) - an empty list if nothing was found.

In Python scripts this works (empty list is taken as False):

matches = getAll(someImage)
if matches:
    print "found: ", len(matches)
else:
    print "not found", someImage
- wait([PS][, seconds])
Wait until the given pattern PS appears in the region.
- param PS:
a
Patternobject or a string (path to an image file or just plain text)- param seconds:
a number, which can have a fraction, as maximum waiting time in seconds. The internal granularity is milliseconds. If not specified, the auto wait timeout value set by
Region.setAutoWaitTimeout()is used. Use the constant FOREVER to wait for an infinite time.- return:
a
Matchobject that contains the best match or fails if not found
If PS is not specified, the script just pauses for the specified amount of time. It is still possible to use
sleep(seconds)instead, but this is deprecated.If PS is specified, it keeps searching the given pattern in the region until the image appears ( would have been found with
Region.find()) or the specified amount of time has elapsed. At least one find operation is performed, even if 0 seconds is specified.)Side Effect lastMatch: the best match can be accessed using
Region.getLastMatch()afterwards.Note: You may adjust the scan rate (how often a search during the wait takes place) by setting
Settings.WaitScanRateappropriately.- waitVanish(PS[, seconds])
Wait until the given pattern PS in the region vanishes.
- Parameters:
PS – a
Patternobject or a string (path to an image file or just plain text)seconds – a number, which can have a fraction, as maximum waiting time in seconds. The internal granularity is milliseconds. If not specified, the auto wait timeout value set by
Region.setAutoWaitTimeout()is used. Use the constant FOREVER to wait for an infinite time.
- Returns:
True if the pattern vanishes within the specified waiting time, or False if the pattern stays visible after the waiting time has elapsed.
This method keeps searching the given pattern in the region until the image vanishes (can not be found with
Region.find()any longer) or the specified amount of time has elapsed. At least one find operation is performed, even if 0 seconds is specified.Note: You may adjust the scan rate (how often a search during the wait takes place) by setting
Settings.WaitScanRateappropriately.
- exists(PS[, seconds])
Wait until the given pattern PS appears in the region. Does not throw FindFailed.
- Parameters:
PS – a
Patternobject or a string (path to an image file or just plain text)seconds – a number, which can have a fraction, as maximum waiting time in seconds. The internal granularity is milliseconds. If not specified, the auto wait timeout value set by
Region.setAutoWaitTimeout()is used. Use the constant FOREVER to wait for an infinite time.
- Returns:
a
Matchobject that contains the best match. None is returned, if nothing is found within the specified waiting time
Does exactly the same as
Region.wait(), but no exception is raised in case of FindFailed. So it can be used to symplify scripting in case that you only want to know wether something is there or not to decide how to proceed in your workflow. So it is typically used with an if statement. At least one find operation is performed, even if 0 seconds is specified. So specifying 0 seconds saves some time, in case there is no need to wait, since its your intention to get the information “not found” directly.Side Effect lastMatch: the best match can be accessed using
Region.getLastMatch()afterwards.Note: You may adjust the scan rate (how often a search during the wait takes place) by setting
Settings.WaitScanRateappropriately.
- has(PS[, seconds])
Checks wether the given pattern PS is visible in the region. Does not throw FindFailed.
Same as
Region.exists(), but returns true if found and false otherwise. So it is a convenience wrapper intended to be used in logical expressions (if, while, …).If you need the match in case of found, you have to use
Region.getLastMatch()afterwards.
Find more than one image in a Region at the same time
Added in version X1.1.2.
In a Region one wants to look for more than one image at the same time and analyse the resulting matches. This approach can be used for example, to differentiate between GUI states, verify larger patterns by only searching for parts of it or find out the best match for variants of an image.
Internally the searches for the given images are run in parallel against the same screenshot taken at start of the operation, to optimize the overall searchtime.
The result is a list of matches, where each match carries a zero-based index, pointing to the corresponding image in the given list of images. Hence this index is the base information for the post-processing of the matches if any (the list of matches is empty in case none of the given images matched).
Use match.getIndex() to identify the only matching image (…Best) or the corresponding matching image (…Any) from the images (index left to right, zero-based) or from the given image list (zero-based).
Supposing the variables img0, img1, img2, img3 have been setup before as image filenames or patterns, then the following example would print, if all images are visible in that moment except img1:
images = [img0, img1, img2, img3]
matches = findAnyList(images)
for match in matches:
    print match.getIndex(), match.getScore(), match.toStringShort()

# prints out something like:
0 0.999999761581 M[137,46 136x28]@S(0)
2 0.999999761581 M[368,99 124x27]@S(0)
3 0.999994277954 M[489,72 220x29]@S(0)
Currently there are 2 features available, based on this concept:
findBest(img0, img1, img2, ...)andfindBestList(ListOfImages)return the best match of all (might be null)
findAny(img0, img1, img2, ...)andfindAnyList(ListOfImages)return a list of matches (might be empty)
The variant having as parameter (img0, img1, img2, ...) expects an arbitrary number of image filenames and/or patterns.
The …List variant expects a prepared Tuple/List, that contains an arbitrary number of image filenames and/or patterns.
This is an example for findBest():
match = findBest(img0, img1, img2, img3)
if match:
    print "found img%d" % match.getIndex()

# prints out something like
found img1
Added in version X2.0.5.
waitBest(), waitBestList(), waitAny(), waitAnyList()
These are variants, that wait for some time, until the first match is found. If the wait time exceeds without finding anything, it fails and returns null or an empty list accordingly. Usage same as the find… variants.
- class Region
- findBest(PS...)
- Parameters:
PS... – one or more image filenames and/or patterns as a variable parameterlist
- Returns:
a
Matchobject that contains the best match or None if no image was found at all
- waitBest(waitTime, PS...)
- Parameters:
PS... – one or more image filenames and/or patterns as a variable parameterlist
waitTime – the max time to wait in seconds for the first match
- Returns:
a
Matchobject that contains the best match or None if no image was found at all
- findBestList(ListPS)
- Parameters:
ListPS – a Tuple/List containing one or more image filenames and/or patterns
- Returns:
a
Matchobject that contains the best match or None if no image was found at all
- waitBestList(ListPS)
- Parameters:
ListPS – a Tuple/List containing one or more image filenames and/or patterns
waitTime – the max time to wait in seconds for the first match
- Returns:
a
Matchobject that contains the best match or None if no image was found at all
- findAny(PS...)
- Parameters:
PS... – one or more image filenames and/or patterns as a variable parameterlist
- Returns:
a list of matches for the images found
- waitAny(waitTime, PS...)
- Parameters:
PS... – one or more image filenames and/or patterns as a variable parameterlist
waitTime – the max time to wait in seconds for the first match
- Returns:
a list of matches for the images found
- findAnyList(ListPS)
- Parameters:
ListPS – a Tuple/List containing one or more image filenames and/or patterns
- Returns:
a list of matches for the images found
- waitAnyList(waitTime, ListPS)
- Parameters:
ListPS – a Tuple/List containing one or more image filenames and/or patterns
waitTime – the max time to wait in seconds for the first match
- Returns:
a list of matches for the images found
Observing Visual Events in a Region
This feature is completetely revised in version 1.1.x
Note Some features have a changed behavior, are no longer available or differ in usage compared to prior versions. This break of downward compatibility is by intention, since the complexity of changes could not be hidden. In some cases it forces the revision of scripts, that use the observe feature and are run with version 1.1.x. Watch the notes with a specific feature that changed.
- Main areas of change:
onAppear, onVanish are stopped after first event - use repeat in handler
observe in background now is observeInBackground()
SikuliEvent now is ObserveEvent and uses getters instead of direct access to attributes
You can tell a region to observe that something appears or vanishes,
or something changes in that region. Using the methods
Region.onAppear(), Region.onVanish() and Region.onChange(),
you register an event to be observed, while the observation is running for that Region.
The observation in a Region is started using Region.observe()
and stopped again using Region.stopObserver().
Each Region can have exactly one observer.
For each observer, you can register as many events as
needed. So you can think of it as grouping some wait() and waitVanish()
together and have them processed simultanouesly, while you are waiting for one
of these events to happen.
It is possible to let the script wait for the completion of an observation or
let the observation run in background (meaning in parallel), while your script is continuing.
With a timing parameter you can tell Region.observeInBackground()
to stop observation after the given time.
When one of the visual events happens, an event handler (callback function) provided by you is
called, handing over a ObserveEvent object as a parameter,
that contains all relevant information about
the event and that has features to act on the events or change the behavior of the observation.
During the processing in your handler, the observation is paused until your handler has ended.
Information between the main script and your handlers
can be given forward and backward using global variables or other appropriate measures.
Another option to handle events, that are observed in the background, is to check the status of the observation inline in your workflow. Each registered event has a unique name, that later can be used, to check, wether it already happened or not. Furthermore you can inactivate registered events, so that they are ignored until activated again (see: Named Events).
It’s your responsibility to stop the observation. This can either be done by
calling Region.stopObserver() (in the main workflow or in the handler)
or by starting the observation with a timing parameter. All running observations are stopped
automatically, when the script or Java program (in fact the JVM) terminates.
Since you can have as many region objects as needed and each region can have one observation active and running, theoretically it is possible to have as many visual events being observed at the same time as needed. But in reality, the number of observations is limited by the system resources available to Sikuli at that time.
Be aware, that every observation is a number of different find operations that
are processed repeatedly. So to speed up processing and keep your script
acting, you should define a region for observation as small as possible.
You may adjust the scan rate (how often a search during the observation takes
place) by setting Settings.ObserveScanRate appropriately.
PS: as a parameter in the following methods you have to specify a Pattern or a String (path to an image file or just plain text).
handler: as a parameter in the following methods you have to specify the name of a function, which will be called by the observer, in case the observed event happens. The function name (and usually the function itself) has to be defined in your script before using the appropriate functions to register an observe event. The existance of the function will be checked after starting the script, but before running it.
So to get your script running, you have to have at least the following statements in your script:
def myHandler(event): # you can choose any valid function name
        # event: can be any variable name, it references the ObserveEvent object
        pass # add your statements here

onAppear("path-to-an-image-file", myHandler) # or any other onXYZ()
observe(10) # observes for 10 seconds
Note for Java And this is how you setup a handler in your Java program and run the observation:
// one has to combine observed event and its handler
// overriding the appropriate method
someRegion.onAppear("path-to-an-image-file",
        new ObserverCallBack() {
                @Override
                public void appeared(ObserveEvent event) {
                        // here goes your handler code
                }
        }
);
// run observation in foreground for 10 seconds
someRegion.observe(10)
Here ObserverCallBack is a class defining the possible callback funtions appeared,
vanished and changed as well as findfailed and missing as noop-methods, that have to be overwritten as needed in your implementation
of the ObserverCallBack. You only need to overwrite the one method, that corresponds to your event.
Read ObserveEvent to know what is contained in the event object and what its features are.
NOTE ON CONCURRENCY with ObserveInBackground, the callback concept and Mouse/Keyboard usage In Sikuli version prior to 1.1.0 it could happen, that mouse actions in the handler callback could interfere with mouse actions in the main workflow or other callback handlers, since these threads work in parallel without any automatic synchronization.
Beginning with 1.1.0 mouse actions like click are safe in the way, that they always are completed, before any other click operation can be started (internally handled like a transaction).
So parallel clicks in main workflow and handler should do their job correctly, but might be run in a sequence, that cannot be foreseen. Look here, if you want to have more control over mouse and keyboard usage in parallel processes.
- class Region
- onAppear(PS, handler)
With the given region you register an
APPEARevent, whose pattern/image/text is looked for to be there or to appaear while running an observation with the next call ofobserve(). In the moment the observation is successful for that event, your registered handler is called and the observation is paused until you return from your handler.With the first appearence, the observation for this event is terminated. If you want the observation for this event to be continued, you have to use
ObserveEvent.repeat()before leaving the handler.- Parameters:
PS – a
Patternobject or a string (path to an image file or just plain text)handler – the name of a handler function in the script
- Returns:
a string as unique name of this event to identify this event later
- onVanish(PS, handler)
With the given region you register a
VANISHevent, whose pattern/image/text is looked for to not be there or to vanish while running an observation with the next call ofobserve(). In the moment the observation is successful for that event, your registered handler is called and the observation is paused until you return from your handler.With the first vanishing, the observation for this event is terminated. If you want the observation for this event to be continued, you have to use
ObserveEvent.repeat()before leaving the handler.- Parameters:
PS – a
Patternobject or a string (path to an image file or just plain text.handler – the name of a handler function in the script
- Returns:
a string as unique name of this event to identify this event later
- onChange([minChangedSize, ]handler)
With the given region you register a
CHANGEevent. While running an observation with the next call ofobserve(), it is looked for changes in that region. A change is, if some non-overlapping rectengular areas of the given minimum size changes its pixel content from one observation step to the next. In the moment the observation is successful for that event, your registered handler is called and the observation is paused until you return from your handler.- Parameters:
minChangedSize – the minimum size in pixels of a change to trigger a change event (see
Settings.ObserveMinChangedPixels, default 50).handler – the name of a handler function in the script
- Returns:
a string as unique name of this event to identify this event later
NOTE A subsequent
onChangefor thesame Region objectoverwrites an existingonChange, while keeping the name of the existingonChange.Here is a example that highlights all changes in an observed region.
def changed(event):
        print "something changed in ", event.region
        for ch in event.getChanges():
                ch.highlight() # highlight all changes
        wait(1)
        for ch in event.getChanges():
                ch.highlight() # turn off the highlights

r = selectRegion("select a region to observe")
# any change in r larger than 50 pixels would trigger the changed function
r.onChange(50, changed)
# another way to observe for 30 seconds
r.observeInBackground(); wait(30)
r.stopObserver()
- observe([seconds])
Begin observation within the region. The script waits for the completion of the observation (meaning until the observation is stopped by intention or timed out).
- Parameters:
seconds – a number, which can have a fraction, as maximum observation time in seconds. Use it without parameter as
observeInBackground()or use the constant FOREVER to tell the observation to run for an infinite time (or until stopped bystopObserve()).- Returns:
True, if the observation could be started, False otherwise
For each region object, only one observation can be running at a given time, meaning, that a call to observe(), while an observe for that region is running, is ignored with an error message, returning False.
Note: You may adjust the scan rate (how often a search during the observation takes place) by setting
Settings.ObserveScanRateappropriately.
- observeInBackground([seconds])
The observation is run in the background, meaning that the observation will be run in a subthread and processing of your script is continued immediately.
Take care, that your script continues with some time consuming stuff. Additionally Named Events might be of interest.
- Parameters:
seconds – a number, which can have a fraction, as maximum observation time in seconds. Use without parameter as
observeInBackground()or use the constant FOREVER to tell the observation to run for an infinite time (or until stopped bystopObserve()).
The over all behavior and the features are the same as
Region.observe().
- observe([seconds, ]background=True)
DEPRECATED (will not be in version 2+) Only available in Python scripts for some limited backward compatibility, with the impact, that the Region object must be a Python level Region. In case you have to cast a Java level Region using
Region(someRegion).It is strongly recommended to revise your scripts using this observe feature as soon as possible.
- stopObserver()
Stop observation for this region.
The source region of an observed visual event is available from the event that is passed as parameter to the handler function.
Additionally there is a convenience feature to stop observation within a handler function: simply call
event.stopObserver()inside the handler function.:def myHandler(event): event.stopObserver() # stops the observation # instead of # event.getRegion().stopObserver() onAppear("path-to-an-image-file", myHandler) observe(FOREVER) # observes until stopped in handler
- class ObserveEvent
When processing an observation in a region, a handler function is called, when one of your registered events
Region.onAppear(),Region.onVanish()orRegion.onChange()happen.The one parameter, you have access to in your handler function is an instance of
ObserveEvent. You have access to the following features of the event, that might help to identify the cause of the event, act on the resulting matches and optionally modify the behavior of the observation.
Added in version X1.1.0: Note on versions prior to 1.1.0 The event class was SikuliEvent
and it allowed to directly access the attributes like type, match, region, … .
This class no longer exists and its follow up is the class ObserveEvent.
This break of downward compatibility is by intention, to force the revision of scripts,
that use the observe feature and are run with version 1.1.0+
Added in version X1.1.1.
The feature FindFailed and/or ImageMissing handler allows to specify functions that are visited in the case of these failures happening. The handler gets an ObserveEvent object as parameter, that can be used to analyse the situation and define how the situation should be handled finally (for details see: comments on FindFailed / ImageMissing)
- getType()
get the type of the event
- Returns:
a string containing APPEAR, VANISH, CHANGE, GENERIC, FINDFAILED, MISSING
- isAppear(), isVanish(), isChange(), isGeneric(), isFindFailed(), isMissing()
convenience methods, to check the type
- Returns:
True or False
- getRegion()
The observing region of this event.
- Returns:
the region object
- getPattern()
Get the pattern that triggered this event. A given image is packed into the pattern. This is only valid for APPEAR and VANISH events as well as for FINDFAILED and MISSING.
- Returns:
the pattern object (which allows to access the given image if needed)
- getImage()
Directly access the given image in case of FINDFAILED and MISSING.
- Returns:
the image object
- getMatch()
For an APPEAR you get the
Matchobject that appeared in the observed region (same as withwait()).For a VANISH event, you get the last
Matchobject that was found in the observed region before it vanished.This method is not valid in a CHANGE event.
- Returns:
the match object
- getChanges()
Get a list of
Matchobjects that represent the rectengular areas that changed their content. Their sizes are at leastminChangedSizepixels.This attribute is valid only in a CHANGE event.
- Returns:
an unsorted list of match objects
- getCount()
Get the count how often the handler was visited.
- Returns:
the count as number
- getTime()
Get the time, when the event happened.
- Returns:
a long integer value according to the Java feature
new Date().getTime()
- repeat([waitTime])
Specify the time in seconds, that the observation of this event should pause after returning from the handler.
Remember APPEAR and VANISH events are stopped after the first occurence. You have to use an approriate
repeat(), to continue the observation.
- Parameters:
waitTime – seconds to pause, taken as 0 if not given
- getResponse()
In case of FINDFAILED or MISSING get the current setting of the FindFailedResponse of the event region
- Returns:
PROMPT, RETRY, SKIP or ABORT
- setResponse(response)
In case of FINDFAILED or MISSING set the FindFailedResponse of the event region. This will be the option, that is used after return from the handler for the final reaction.
- Parameters:
response – PROMPT, RETRY, SKIP or ABORT
- getName()
Get the unique name of this event for use with the appropriate features (see working with named events)
- Returns:
a string containing the name
- stopObserver()
Stop observation for this region (shortcut for
event.getRegion().stopObserver()).
Working with named observe events
Additionally to the callback-concept of the observation feature, it is possible, to start one or more observations in background, having registered events without handlers. When these events happen, the event is stored in a list and its observation is paused until the event is taken from the list. Both concepts can be combined per observation.
Events without handlers are registered by omitting the handler parameter in the methods Region.onAppear(), Region.onVanish() and Region.onChange() and storing the returned name for later use.
After having started the observation the usual way using Region.observe(), you can check, wether any events have happened until now, you can access the events using their name or get a list of all events that happened until now.
With the events themselves you can work exactly like in the handler concept (see: ObserveEvent).
The following methods are bound to the region under observation.
- class Region
- hasObserver()
Check wether at least one event is registered for this region. The observation might be running or not.
- Returns:
True or False
- isObserving()
Check wether currently an observation is running for that region
- Returns:
True or False
- hasEvents()
Check wether any events have happened for that region
- Returns:
True or False
- getEvents()
Get the events, that have happened until this moment. The events are purged from the internal event list.
- Returns:
a list of
ObserveEvent(might be empty)
- getEvent(name)
Get the named event and purge it from the internal event list
- Parameters:
name – the name of the event (string)
- Returns:
the named event or None/null if it is not on the internal event list
- setInactive(name)
The named event is paused during the running observation until activated again or the observation is restarted.
- Parameters:
name – the name of the event (string)
- setActive(name)
The named event is activated, so it is observed during the running observation.
- Parameters:
name – the name of the event (string)
Acting on a Region
Besides finding visual objects on the screen, acting on these elements is one of the kernel operations of Sikuli. Mouse actions can be simulated as well as pressing keys on a keyboard.
The place on the screen, that should be acted on (in the end just one specific
pixel, the click point), can be given either as a pattern like with the find
operations or by directly referencing a pixel location
or as center of a region object (match or
screen also) or the target offset location connected with a match. Since all
these choices can be used with all action methods as needed, they are abbreviated
and called like this:
PSMRL: which means, that either a Pattern object or a string (path to an image file or just
plain text) or a Match or a Region or a Location can be used as parameter, in
detail:
P: pattern: a
Patternobject. An implicit find operation is processed first. If successful, the center of the resulting matches rectangle is the click point. If the pattern object has a target offset specified, this is used as click point instead.S: string: a path to an image file or just plain text. An implicit find operation with the default minimum similarity 0.7 is processed first. If successful, the center of the resulting match object is the click point.
M: match: a
matchobject from a previous find operation. If the match has a target specified it is used as the click point, otherwise the center of the match’s rectangle.R: region: a
regionobject whose center is used as click point.L: location: a
locationobject which by definition represents a point on the screen that is used as click point.
It is possible to simulate pressing the so called key modifiers together with the mouse operation or when simulating keyboard typing. The respective parameter is given by one or more predefined constants. If more than one modifier is necessary, they are combined by using “+” or “|”.
Normally all these region methods are used as reg.click(PS), where reg is a
region object. If written as click(PS) the implicit find is done on the default
screen being the implicit region in this case (see: SCREEN as Default Region).
But using reg.click(PS) will
restrict the search to the region’s rectangle and speed up processing, if region is
significantly smaller than the whole screen.
Generally all aspects of find operations and of Region.find()
apply.
If the find operation was successful, the match that was acted on, can be
recalled using Region.getLastMatch().
As a default, if the visual object (image or text) cannot be found, Sikuli will stop the script by raising an Exception FindFailed (details see: not found).
Note on IDE: Capturing is a tool in the IDE, to quickly set up images to search for. These images are named automatically by the IDE and stored together with the script, at the time it is saved (we call the location in the file system bundle-path). Behind the curtain the images itself are specified by using a string containing the file name (path to an image file).
Note: If you need to implement more sophisticated mouse and keyboard actions look at Low Level Mouse and Keyboard Actions.
Note: In case of having more than one Monitor active, refer to Multi Monitor Environments for more details.
Note on Mac: it might be necessary, to use switchApp() before, to prepare the
application for accepting the action.
- class Region
- click(PSMRL[, modifiers])
Perform a mouse click on the click point using the left button.
- Parameters:
PSMRL – a pattern, a string, a match, a region or a location that evaluates to a click point.
modifiers – one or more key modifiers
- Returns:
the number of performed clicks (actually 1). A 0 (integer null) means that because of some reason, no click could be performed (in case of PS may be not Found).
Side Effect if PS was used, the match can be accessed using
Region.getLastMatch()afterwards.Example:
- doubleClick(PSMRL[, modifiers])
Perform a mouse double-click on the click point using the left button.
- Parameters:
PSMRL – a pattern, a string, a match, a region or a location that evaluates to a click point.
modifiers – one or more key modifiers
- Returns:
the number of performed double-clicks (actually 1). A 0 (integer null) means that because of some reason, no click could be performed (in case of PS may be not Found).
Side Effect if PS was used, the match can be accessed using
Region.getLastMatch()afterwards.
- rightClick(PSMRL[, modifiers])
Perform a mouse click on the click point using the right button.
- Parameters:
PSMRL – a pattern, a string, a match, a region or a location that evaluates to a click point.
modifiers – one or more key modifiers
- Returns:
the number of performed right clicks (actually 1). A 0 (integer null) means that because of some reason, no click could be performed (in case of PS may be not Found).
Side Effect if PS was used, the match can be accessed using
Region.getLastMatch()afterwards.
- highlight()
Highlight toggle (switched on if off and vice versa): highlight the region, showing a red colored frame around it, until the effect is stopped by another parameterless highlight call with the same region. The script continues.
- highlight(color)
- Parameters:
color – see Note below
Highlight toggle (switched on if off and vice versa): highlight the region, showing a frame with the given color around it, until the effect is stopped by another parameterless highlight call with the same region. The script continues.
- highlightOn()
Definitely switch the highlight on (red frame, current state ignored). The script continues.
- highlightOn(color)
- Parameters:
color – see Note below
Definitely switch the highlight on (True) (current state ignored) using the given color. The script continues.
- highlightOff()
Definitely switch the highlight off (current state ignored). The script continues.
- highlightAllOff()
Switch off all currently active highlights.
- highlight(seconds)
Highlight the region for the given time in seconds, showing a red colored frame around it.
- Parameters:
seconds – a decimal number taken as duration in seconds
The region is highlighted showing the frame around it for the given time, while the script is suspended for this time.
- highlight(seconds, color)
Highlight the region for the given time in seconds, showing a frame with the given color around it.
- Parameters:
seconds – a decimal number taken as duration in seconds
color – see Note below
The region is highlighted showing a frame with the given color around it for the given time, while the script is suspended for the this time.
- Note on parameter color: There are these options to specify the color
name of a color as string. The following names are accepted: black, blue, cyan, gray, green, magenta, orange, pink, red, white, yellow (lowercase and uppercase can be mixed, internally transformed to all uppercase)
the following color names exactly so: lightGray, LIGHT_GRAY, darkGray, DARK_GRAY
a string containing a hex value like in HTML: #XXXXXX (6 hex digits) specifying an RGB value
a string containing digits #rrrgggbbb, where rrr, ggg, bbb are integer values in range 0 - 255 padded with leading zeros if needed (hence exactly 9 digits) and so specifying an RGB value
Example:
m = find(some_image)

# the red frame will blink for about 7 - 8 seconds
for i in range(5):
        m.highlight(1)
        wait(0.5)

# a second red frame will blink as an overlay to the first one
m.highlight()
for i in range(5):
        m.highlight(1)
        wait(0.5)
m.highlight()

# the red frame will grow 5 times
for i in range(5):
        m.highlight(1)
        m = m.nearby(20)
Note: The coloured frame is just an overlay in front of all other screen content and stays in its place, independently from the behavior of this other content, which means it is not “connected” to the content of the defining region. But it will be adjusted automatically, if you change position and/or dimension of this region in your script, while it is highlighted.
Note: Due to the implementation of this function, the target application might loose focus and opened menus or lists get closed again. In other cases the highlight frame is not or not completely visible (not getting to the front). In these cases the highlight feature cannot be used for tracking the search results.
A possible workaround is to use hover(), to move the mouse over the match or even use a function like this
- def hoverHighlight(reg, loop = 1):
- for n in range(loop):
hover(reg.getTopLeft()) hover(reg.getTopRight()) hover(reg.getBottomRight()) hover(reg.getBottomLeft()) hover(reg.getTopLeft())
Using this function instead of highlight will let the mousepointer visit the corners of the given region clockwise, starting and stopping top left. With the standard move delay of 0.5 seconds this will last about 2 seconds for one loop (second parameter, default 1).
- hover(PSMRL)
Move the mouse cursor to hover above a click point.
- Parameters:
PSMRL – a pattern, a string, a match, a region or a location that evaluates to a click point.
modifiers – one or more key modifiers
- Returns:
the number 1 if the mousepointer could be moved to the click point. A 0 (integer null) returned means that because of some reason, no move could be performed (in case of PS may be not Found).
Side Effect if PS was used, the match can be accessed using
Region.getLastMatch()afterwards.
- dragDrop(PSMRL, PSMRL[, modifiers])
Perform a drag-and-drop operation from a starting click point to the target click point indicated by the two PSMRLs respectively.
- Parameters:
PSMRL – a pattern, a string, a match, a region or a location that evaluates to a click point.
modifiers – one or more key modifiers
If one of the parameters is PS, the operation might fail due to not Found.
Sideeffect: when using PS, the match of the target can be accessed using
Region.getLastMatch()afterwards. If only the first parameter is given as PS, this match is returned byRegion.getLastMatch().If the operation does not perform as expected (usually caused by timing problems due to delayed reactions of applications), you may adjust the internal timing parameters
Settings.DelayBeforeMouseDown,Settings.DelayBeforeDragandSettings.DelayBeforeDrop(default value is 0.3 seconds) for the next action (timing is reset to default after the operation is completed). In case this might be combined with the internal timing parameterSettings.MoveMouseDelay.Note: If you need to implement more sophisticated mouse and keyboard actions look at Low Level Mouse and Keyboard Actions.
- drag(PSMRL)
Start a drag-and-drop operation by starting the drag at the given click point.
- Parameters:
PSMRL – a pattern, a string, a match, a region or a location that evaluates to a click point.
- Returns:
the number 1 if the operation could be performed. A 0 (integer null) returned means that because of some reason, no move could be performed (in case of PS may be not Found).
The mousepointer is moved to the click point and the left mouse button is pressed and held, until the button is released by a subsequent mouse action. (e.g. a
Region.dropAt()afterwards).If the operation does not perform as expected (usually caused by timing problems due to delayed reactions of applications), you may adjust the internal timing parameters
Settings.DelayBeforeMouseDown, andSettings.DelayBeforeDrag(default value is 0.3 seconds) for the next action (timing is reset to default after the operation is completed).Side Effect if PS was used, the match can be accessed using
Region.getLastMatch()afterwards.
- dropAt(PSMRL[, delay])
Complete a drag-and-drop operation by dropping a previously dragged item at the given target click point.
- Parameters:
PSMRL – a pattern, a string, a match, a region or a location that evaluates to a click point.
- Returns:
the number 1 if the operation could be performed. A 0 (integer null) returned means that because of some reason, no move could be performed (in case of PS may be not Found).
The mousepointer is moved to the click point and the left mouse button is released. If it is necessary to visit one ore more click points after dragging and before dropping, you can use
Region.mouseMove()orRegion.hover()inbetween anddropAtonly for the final destination.If the operation does not perform as expected (usually caused by timing problems due to delayed reactions of applications), you may adjust the internal timing parameter
Settings.DelayBeforeDrop(default value is 0.3 seconds) for the next action (timing is reset to default after the operation is completed).Side Effect if PS was used, the match can be accessed using
Region.getLastMatch()afterwards.
- type([PSMRL, ]text[, modifiers])
Type the text at the current focused input field or at a click point specified by PSMRL.
- Parameters:
PSMRL – a pattern, a string, a match, a region or a location that evaluates to a click point.
modifiers – one or more modifier keys (Class Key)
- Returns:
the number 1 if the operation could be performed, otherwise 0 (integer null), which means, that because of some reason, it was not possible or the click could be performed (in case of PS may be not Found).
This method simulates keyboard typing interpreting the characters of text based on the layout/keymap of the standard US keyboard (QWERTY).
Special keys (ENTER, TAB, BACKSPACE, …) can be incorporated into text using the constants defined in Class Key using the standard string concatenation +.
If PSMRL is given, a click on the clickpoint is performed before typing, to gain the focus. (Mac: it might be necessary, to use
switchApp()to give focus to a target application before, to accept typed/pasted characters.)If PSMRL is omitted, it performs the typing on the current focused visual component (normally an input field or an menu entry that can be selected by typing something).
Side Effect if PS was used, the match can be accessed using
Region.getLastMatch()afterwards.Note: If you need to type international characters or you are using layouts/keymaps other than US-QWERTY, you should use
Region.paste()instead. Since type() is rather slow because it simulates each key press, for longer text it is preferrable to useRegion.paste().Best Practice: As a general guideline, the best choice is to use
paste()for readable text andtype()for action keys like TAB, ENTER, ESC, …. Use onetype()for each key or key combination and be aware, that in some cases a shortwait()after atype()might be necessary to give the target application some time to react and be prepared for the next Sikuli action.SPECIAL macOS Sierra 10.12+ If type does not behave as expected (characters like e or s are not typed) then look here for explanation and workaround.
- paste([PSMRL, ]text)
Paste the text at a click point.
- Parameters:
PSMRL – a pattern, a string, a match, a region or a location that evaluates to a click point.
modifiers – one or more key modifiers
- Returns:
the number 1 if the operation could be performed, otherwise 0 (integer null), which means, that because of some reason, it was not possible or the click could be performed (in case of PS may be not Found).
Pastes text using the clipboard (OS-level shortcut (Ctrl-V or Cmd-V)). So afterwards your clipboard contains text.
paste()is a temporary solution for typing international characters or typing on keyboard layouts other than US-QWERTY.If PSMRL is given, a click on the clickpoint is performed before typing, to gain the focus. (Mac: it might be necessary, to use
switchApp()to give focus to a target application before, to accept typed/pasted characters.)If PSMRL is omitted, it performs the paste on the current focused component (normally an input field).
Side Effect if PS was used, the match can be accessed using
Region.getLastMatch()afterwards.Note: Special keys (ENTER, TAB, BACKSPACE, …) cannot be used with
paste(). If needed, you have to split your complete text into two or morepaste()and usetype()for typing the special keys inbetween. Characters like \n (enter/new line) and \t (tab) should work as expected withpaste(), but be aware of timing problems, when using e.g. intervening \t to jump to the next input field of a form.
Be aware: Python scripting In the IDE you can use Unicode/UTF8 characters, since this is the default encoding for the script text. The current Jython still is at Python level 2.7, which does not support UTF8 characters natively in the way it is expected by the underlying Java API. There is a convenience function available
unicd("some text containing non-ascii characters), that can be used, to make a string acceptable for the Java layer.Example:
paste("йцуке") # will end up in some garbage
paste(unicd("йцуке")) # will work as expected
Extracting Text from a Region
- class Region
Added in version 2.0.0.
The text and OCR features are completely revised. Everything is now available at the Java level
through the use of Tess4j, which in turn is a wrapper around the native library Tesseract.
More details can be found here.
- text()
Extract the text contained in the region using OCR.
- return:
the text as a string (unicode). Multiple lines of text are separated by intervening linefeeds.
- collectWords()
only 1.1.4+: Extract the text contained in the region as a list of the words (in fact match objects - see example) in order top left to bottom right:
words = someRegion.collectWords() # a list of match objects
firstWordMatch = words[0] # the region on screen containing the word
firstWord = firstWordMatch.getText() # finally the text contained in the word's region
- return:
the text as a list of match/regions containing words. (Java: List<Match>). Use
Match.getText()to get a single text string.
- collectLines()
only 1.1.4+: Extract the text contained in the region as a list of the words (in fact match objects - see example) in order top left to bottom right:
lines = someRegion.collectLines() # a list of match objects
firstLineMatch = lines[0] # the region on screen containing the line
firstLine = firstLineMatch.getText() # finally the text contained in the line's region
- return:
the text as a list of match/regions containing lines. (Java: List<Match>) Use
Match.getText()to get a single text string.
As a convenience there are variants that only return a list of the words/lines as text (Java: List<String>) (hence no information, where on the screen they are):
words = collectWordsText() # only the list of words in order top left to bottom right
lines = collectLinesText() # only the list of textlines in order top left to bottom right
BE AWARE in Jython scripts The text is returned as unicode strings. Jython standard strings are not aware of unicode and hence will produce garbage or error messages when used with the normal print statement.
There is a convenience print function uprint(someText, someOtherTexdt, ...), which is aware of the unicode situation:
words = collectWordsText()
for word in words:
    uprint(word)

# or as one line
line = ""
for word in words:
    line += word + ", "
uprint(line)
Low-level Mouse and Keyboard Actions
- class Region
- mouseDown(button)
Press the mouse button down.
- Parameters:
button – one or a combination of the button constants
Button.LEFT,Button.MIDDLE,Button.RIGHT.- Returns:
the number 1 if the operation is performed successfully, and zero if otherwise.
The mouse button or buttons specified by button are pressed until another mouse action is performed.
- mouseUp([button])
Release the mouse button previously pressed.
- Parameters:
button – one or a combination of the button constants
Button.LEFT,Button.MIDDLE,Button.RIGHT.- Returns:
the number 1 if the operation is performed successfully, and zero if otherwise.
The button specified by button is released. If button is omitted, all currently pressed buttons are released.
- mouseMove(PSRML)
Move the mouse pointer to a location indicated by PSRML.
- Parameters:
PSMRL – a pattern, a string, a match, a region or a location that evaluates to a click point.
- Returns:
the number 1 if the operation could be performed. If using PS (which invokes an implicity find operation), find fails and you have switched off FindFailed exception, a 0 (integer null) is returned. Otherwise, the script is stopped with a FindFailed exception.
Sideeffects: when using PS, the match can be accessed using
Region.getLastMatch()afterwards
- mouseMove(xoff, yoff)
Move the mouse pointer from it’s current position to the position given by the offset values (<0 left, up >0 right, down)
- Parameters:
xoff – horizontal offset
yoff – vertical offset
- Returns:
1 if possible, 0 otherwise
- wheel(PSRML, direction, steps)
Move the mouse pointer to a location indicated by PSRML and turn the mouse wheel in the specified direction by the specified number of steps.
- Parameters:
PSMRL – a pattern, a string, a match, a region or a location that evaluates to a click point.
direction – one of the button constants
Button.WHEEL_DOWNorButton.WHEEL_UPdenoting the wheeling direction.steps – an integer indicating the amoung of wheeling.
Sideeffects: when using PS, the match can be accessed using
Region.getLastMatch()afterwards
- keyDown(key | list-of-keys)
Press and hold the specified key(s) until released by a later call to
Region.keyUp().- Parameters:
key|list-of-keys – one or more keys (use the consts of class Key). A list of keys is a concatenation of several key constants using “+”.
- Returns:
the number 1 if the operation could be performed and 0 if otherwise.
- keyUp([key | list-of-keys])
Release given keys. If no key is given, all currently pressed keys are released.
- Parameters:
key|list-of-keys – one or more keys (use the consts of class Key). A list of keys is a concatenation of several key constants using “+”.
- Returns:
the number 1 if the operation could be performed and 0 if otherwise.
Exception FindFailed
As a default, find operations (explicit
and implicit) when not successful
raise an Exception FindFailed, that will
stop the script immediately.
To implement some checkpoints, where you want to asure your workflow, use
Region.exists(), that reports a not found situation without raising
FindFailed (returns False instead).
To run all or only parts of your script without FindFailed exceptions to be raised,
use Region.setThrowException() or Region.setFindFailedResponse()
to switch it on and off as needed.
For more sophisticated concepts, you can implement your own exception handling using
the standard Python construct try: ... except: ... .
Added in version X1.1.1.
Generally a FindFailed situation is also signalled (besides that the image could not befound on the screen), if the image could not be found on the current image path and hence could not be loaded for the find process.
Added in version X1.1.1.
To implement even more sophisticated concepts, it is possible to declare handler functions, that are visited in case of a FindFailed and/or ImageMissing situations and allow to take corrective actions. Before leaving the handler you can specify how the case should finally be handled (ABORT, SKIP, RETRY or PROMPT). If specified, a handler is always visited before any other action is taken. Handlers can be specified for a single Region object and/or globally with class FindFailed, so that each new Region object afterwards would call this handler in case.
The PROMPT response now allows to recapture the image on the fly or just to capture an image, that is not loadable.
Added in version X1.0-rc2.
- These are the possibilities to handle “not found” situations:
- generally abort a script, if not handled with
try: ... except: ... (the default setting or using
setThrowException(True)orsetFindFailedResponse(ABORT))
- generally abort a script, if not handled with
- generally ignore all “not found” situations
(using
setThrowException(False)orsetFindFailedResponse(SKIP)),
- want to be prompted in such a case
(using
setFindFailedResponse(PROMPT))
- advise Sikuli to wait forever (be careful with that!)
(using
setFindFailedResponse(RETRY))
Added in version X1.1.1:
- advise Sikuli to visit the specified handler before taking any other action
(using
setFindFailedHandler(handler))
Comment on using PROMPT:
This feature is helpful in following situations:
you are developing something, that needs an application with it’s windows to be in place, but this workflow you want to script later. If it comes to that point, you get the prompt, arrange the app and click Retry. Your workflow should continue.
you have a workflow, where the user might do some corrective actions, if you get a FindFailed
guess you find more ;-)
In case of a FindFailed, you get the following prompt:
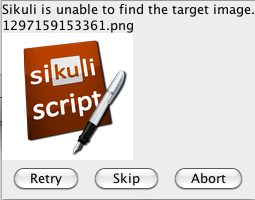
Added in version X1.1.1.
Clicking Retry would again try to find the image. Capture/Skip would allow to (re)capture the image and Abort would end the script. In case of clicking Capture you get another similar prompt, that allows you to either do the capture, finally skip or advise SikuliX to abort the script immediately.
Examples: 4 solutions for a case, where you want to decide how to proceed in a workflow based on the fact that a specific image can be found. (pass is the python statement, that does nothing, but maintains indentation to form the blocks):
# --- nice and easy
if exists("path-to-image"): # no exception, returns None when not found
        pass # it is there
else:
        pass # we miss it

# --- using exception handling
# every not found in the try block will switch to the except block
try:
        find("path-to-image")
        pass # it is there
except FindFailed:
        pass # we miss it

# --- using setFindFailedResponse
setFindFailedResponse(SKIP) # no exception raised, not found returns None
if find("path-to-image"):
        setFindFailedResponse(ABORT) # reset to default
        pass # it is there
else:
        setFindFailedResponse(ABORT) # reset to default
        pass # we miss it

# --- using setThrowException
setThrowException(False) # no exception raised, not found returns None
if find("path-to-image"):
        setThrowException(True) # reset to default
        pass # it is there
else:
        setThrowException(True) # reset to default
        pass # we miss it
Comment on using a handler function:
- setFindFailedHandler(functionname)
- Parameters:
functionname – the name of a function, that should handle FindFailed situations (no apostrophes!)
- setImageMissingHandler(functionname)
- Parameters:
functionname – the name of a function, that should handle ImageMissing situations (no apostrophes!)
To specify the respective handlers globally for all new Regions use
FindFailed.setFindFailedHandler(or as a shortcut for that:FindFailed.setHandler) andFindFailed.setImageMissingHandlerrespectively.Both methods might name the same handler function, since it is possible to differentiate the situation to handle by inspecting the type of the event, that is the parameter, when the handler is called. On the other hand with 2 handlers it is easier and more transparent to handle both situations completely different.
This is a basic handler:
def handler(event):
    print "handler entered for", event.getType()
    # type here might be FINDFAILED or MISSING
    # do something
    event.setResponse(PROMPT) # now go back and prompt the user
    # or use RETRY, SKIP or ABORT
For more information on the possibilities in a handler see
ObserveEvent.Note for Java And this is how you setup a handler in your Java program:
someRegion.setFindFailedHandler(new ObserveCallback() {
        @Override
        public void findfailed(ObserveEvent event) {
                // here goes your handler code
        }
});
… and to set globally:
FindFailed.setFindFailedHandler(new ObserveCallback() {
        @Override
        public void findfailed(ObserveEvent event) {
                // here goes your handler code
        }
});
… for the image missing situation combine
setImageMissingHandlerwith overridingmissing.
- class Region
Reminder If used without specifying a region, the default/primary screen (default region SCREEN) is used.
Added in version X1.0-rc2.
- setFindFailedResponse(ABORT | SKIP | PROMPT | RETRY)
For the specified region set the option, how Sikuli should handle “not found” situations. The option stays in effect until changed by another
setFindFailedResponse().- Parameters:
ABORT – all subsequent find failed operations (explicit or implicit) will raise exception FindFailed (which is the default when a script is started).
SKIP – all subsequent find operations will not raise exception FindFailed. Instead, explicit find operations such as
Region.find()will return None. Implicit find operations (action functions) such asRegion.click()will do nothing and return 0.PROMPT – all subsequent find operations will not raise exception FindFailed. Instead you will be prompted for the way to handle the situation (see using PROMPT). Only the current find operation is affected by your response to the prompt.
RETRY – all subsequent find operations will not raise exception FindFailed. Instead, Sikuli will try to find the target until it gets visible. This is equivalent to using
wait( ... , FOREVER)instead offind()or using setAutoWaitTimeout(FOREVER).
Added in version X1.1.1.
- setFindFailedHandler(handler)
For all subsequent find failed operations (explicit or implicit) the specified handler should be visited in case of FindFailed or image not loadable. (see using a FindFailed handler)
- Parameters:
handler – the name of the handler function that should be visited.
- getFindFailedResponse()
Get the current setting in this region.
- Returns:
ABORT or SKIP or PROMPT or RETRY
Usage:
val = getFindFailedResponse()
if val == ABORT:
        print "not found will stop script with Exception FindFailed"
elif val == SKIP:
        print "not found will be ignored"
elif val == PROMPT:
        print "when not found you will be prompted"
elif val == RETRY:
        print "we will always wait forever"
else:
        print val, ": this is a bug :-("
Note: It is recommended to use
set/getFindFailedResponse()instead ofset/getThrowException()since the latter ones might be deprecated in the future.- setThrowException(False | True)
By using this method you control, how Sikuli should handle not found situations in this region.
- Parameters:
True – all subsequent find operations (explicit or implicit) will raise exception FindFailed (which is the default when a script is started) in case of not found.
False – all subsequent find operations will not raise exception FindFailed. Instead, explicit find operations such as
Region.find()will return None. Implicit find operations (action functions) such asRegion.click()will do nothing and return 0.
- getThrowException()
- Returns:
TrueorFalse
Get the current setting as True or False (after start of script, this is True by default) in this region.
Grouping Method Calls ( with Region: )
Instead of:
# reg is a region object
if not reg.exists(image1):
        reg.click(image2)
        reg.wait(image3, 10)
        reg.doubleClick(image4)
you can group methods applied to the same region using Python’s with syntax:
# reg is a region object
with reg:
        if not exists(image1):
                click(image2)
        wait(image3, 10)
        doubleClick(image4)
All methods inside the with block (mind indentation) that have the region omitted are redirected to the
region object specified at the with statement.
IMPORTANT Usage Note
This only works without problems for region objects created on the scripting level using one of
the constructors Region().
Region objects created with Region methods, that return new region objects, might not work though in some cases.
If you get strange results or errors in the with block (e.g. syntax error __enter__ is not defined for this region) cast your Region object to a scripting level Region object using
castedRegion = Region(regionNotWorking) and use castedRegion in the with clause
or do it like this:
# reg is a scripting level region object
regNew = reg.left() # returns a non-scripting-level region object
with Region(regNew):
        if not exists(image1):
                click(image2)
        wait(image3, 10)
        doubleClick(image4)
